Your own report template, step by step
Datumvia can fill in your own Word document — your letterhead, your wording, your layout — and drop the checklist you ticked off on site into the middle of it. Here is what that looks like at each stage.
1. The Word file, with brackets
Start from a report you already send. Anywhere a value changes from job to job, replace it with
a name in double curly brackets. That is the whole trick: {{site_address}} instead
of the address you typed last time.
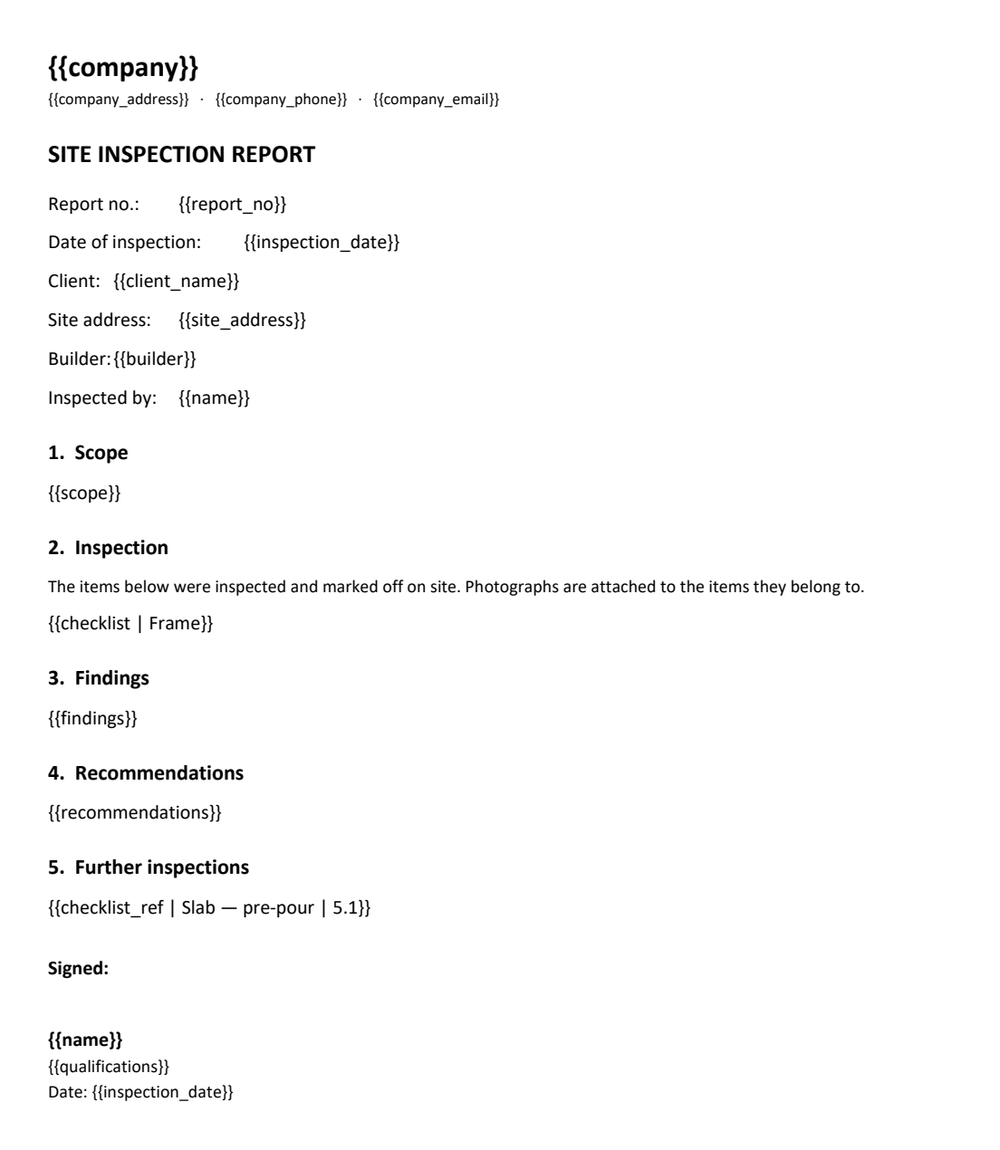
Save it as .docx, then in the app open a job → Cover report → Use a template → import a Word template and pick the file. Datumvia reads the brackets and builds the form for you.
Download the sample template (.docx) — the one shown above, ready to edit.
See what gets copied
Loading…
Remove client names, addresses and signatures before you upload the report — a blank copy is best. If your assistant can read web links, you can give it datumvia.com/ai/report-template.md instead of pasting.
2. Filling it in on the phone
When you add the template, Datumvia asks which discipline it belongs to — Structural, Electrical, or a name of your own — so a long list of templates can be filtered. Skip it if you like; hold the template in the list later to change it.
Each bracket appears as a field, in the order it appears in your document.
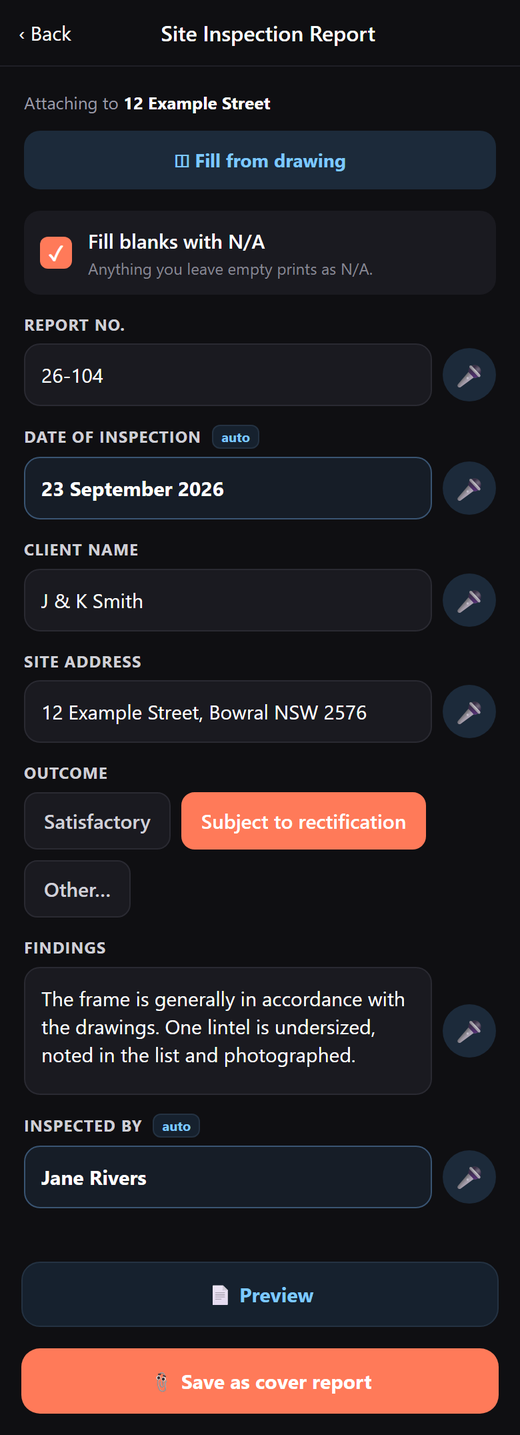
Three things save typing:
- Your details fill themselves in. A field named after something in your
Profile —
{{name}},{{company}},{{phone}},{{qualifications}}— is filled from there. Date fields start at today. - Fill from drawing reads the title block of the PDF you are working on and offers the client, site address and job number.
- Dictate into any field with the microphone beside it, hands full or gloves on.
Tick Fill blanks with N/A at the top if you want anything left empty to print as N/A rather than as a gap. Preview shows the report with filled values highlighted and anything missing in red — that highlighting is for checking and never reaches the PDF you send.
3. The finished report
Save it and the report becomes the cover of the job: your document, filled in, with the checklist in place. The drawing, the pinned photos and any map pages follow behind it in the one PDF.
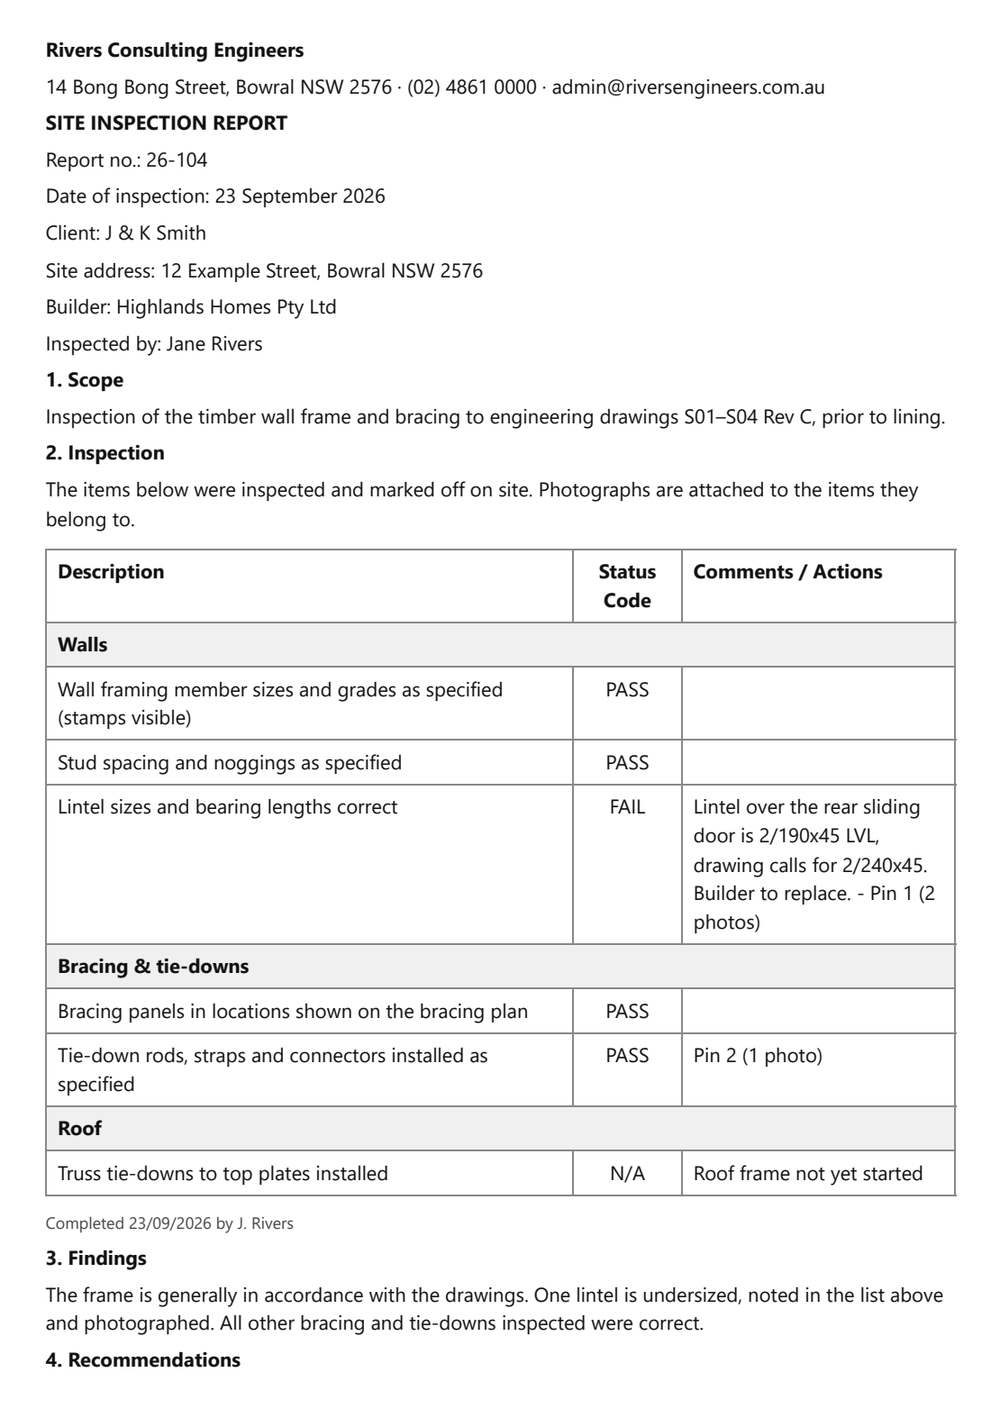
Checklists in a report
There are two ways to carry a list, and you choose per template by which bracket you use.
They differ in one thing that matters on a phone: whether the pins are live.
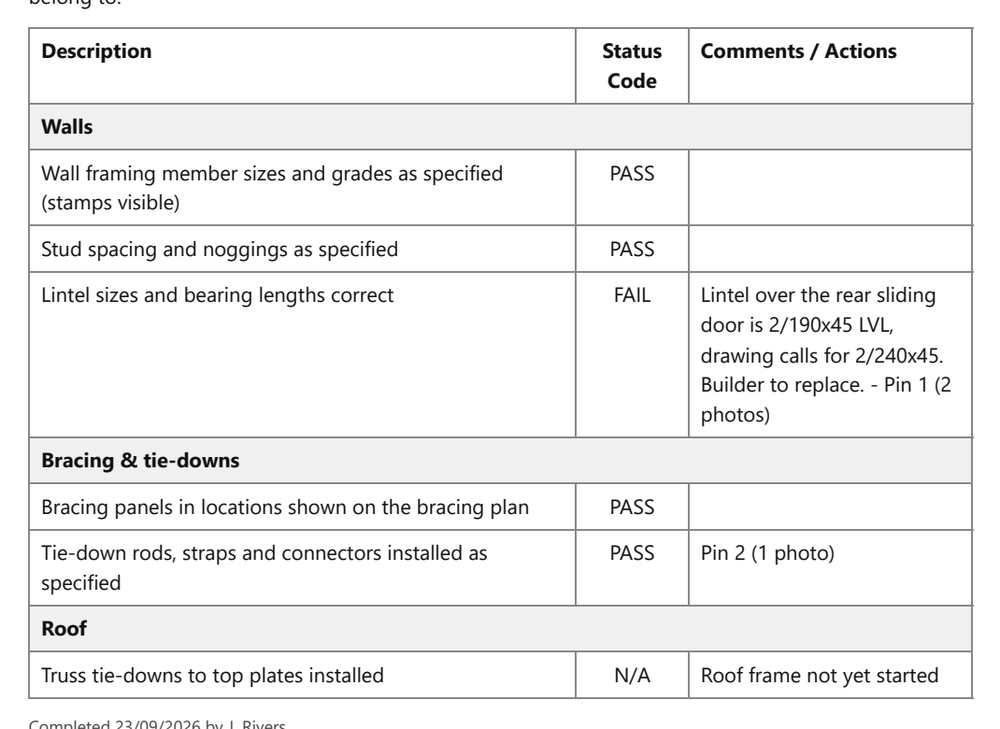
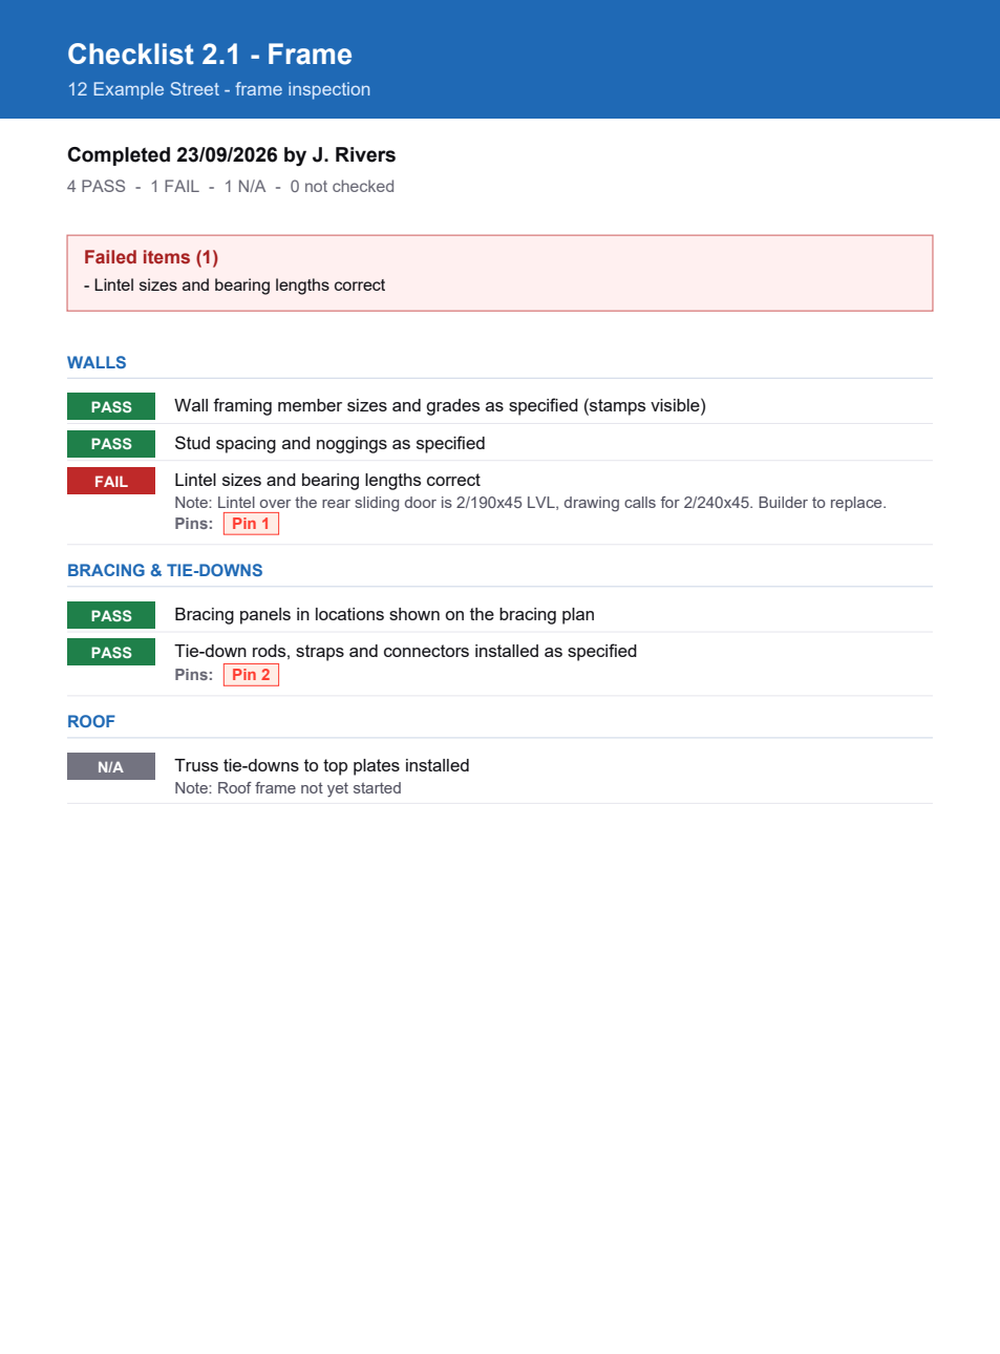
The reason is when each one is made. The report is built on the phone before the pages are put together, so at that moment nothing knows what page a photo will land on — a link would have nowhere to point. The attached pages are drawn into the finished PDF, where the photo pages already exist, so they can link straight to them.
So: put the list inside the report when the certificate has to read as one document on paper, and refer to it when whoever gets the PDF will read it on a screen and chase the photos.
The whole list, in place
{{checklist | Frame}} prints that list where the bracket sits: every item, the result,
your comments, and which pin holds the photos.
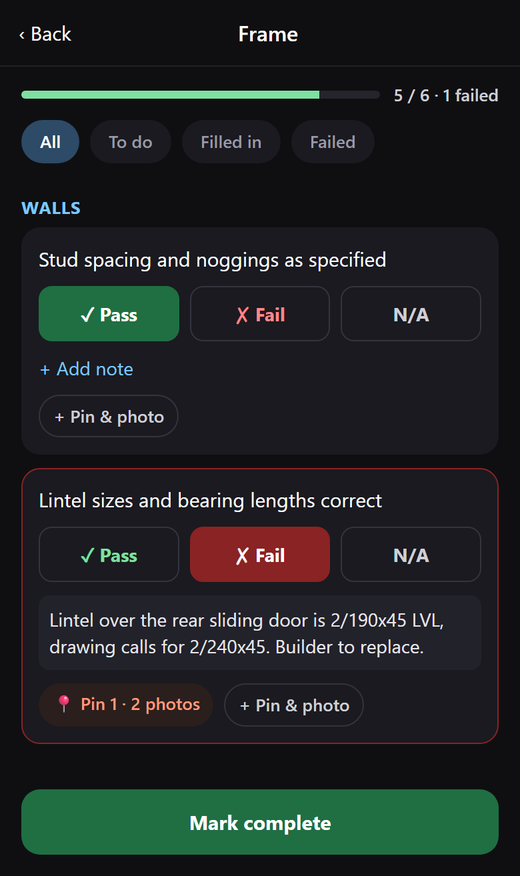
A reference to the list behind
{{checklist_ref | Slab — pre-pour | 5.1}} prints a line pointing at the list instead,
and the list prints on its own pages behind the report — where the pin chips are tappable and the
photos follow.
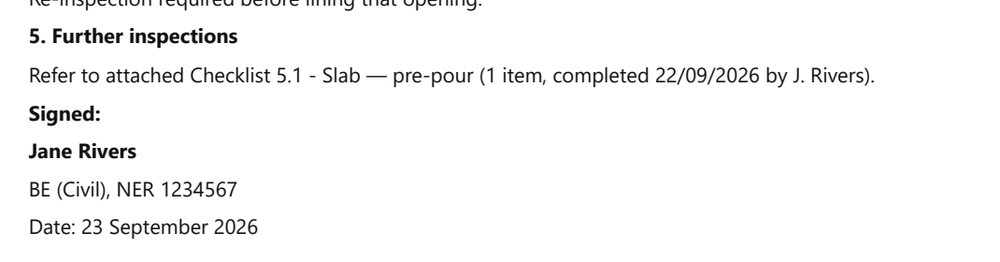
Run the same list twice — an inspection and then the re-check after rectification — and one bracket
covers both: | 5.1 gives 5.1, 5.2, 5.3 in the order you started them.
Bullets and numbered lists
Recommendations and defects are usually a list, so a field written as one prints as one. Start each line with a dash for bullets:
- Replace the rear sliding door lintel with 2/240x45 LVL
- Re-inspect before that opening is lined
- Remaining bracing was correct at the time of inspection
or number them yourself, and the report numbers them properly:
1. Replace the rear sliding door lintel with 2/240x45 LVL
2. Re-inspect before that opening is lined
The numbers you type are not printed twice — they tell the app where the list starts, so a list beginning at 3 still reads 3, 4, 5. A dictated list works the same way: say the dash or the number at the start of each line.
Anything that isn’t a list start to finish is left exactly as you typed it, line breaks and all. One bulleted line followed by a sentence stays plain text, so ordinary paragraphs are never turned into something you didn’t ask for.
Every bracket you can use
| Bracket | What it does |
|---|---|
{{anything}} | A field you type or dictate. The name becomes the label. |
{{name}}, {{company}}, {{phone}},
{{qualifications}} | Filled from your Profile. |
{{inspection_date}} | Any name with “date” in it starts at today. |
{{outcome | Pass | Fail | Further work}} | A dropdown. “Other…” is always offered as well. |
{{logo}} | Your logo from Profile. |
{{checklist | List name}} | That checklist, printed in full where the bracket sits. Leave the name out for every list on the job. |
{{checklist_ref | List name | 5.1}} | A “refer to attached Checklist 5.1” line. The number is optional. |
{{outcome | Pass | Fail}} sets the choices for that one field. A checklist is the other
way round: every item is answered with the same buttons, so they belong to the list, not to each
line — set once when the list is written or imported. See
asking for different answers.
Tips and limits
- Type the brackets in one go. If Word splits a name across a spell-check or formatting change, the app may not see it. Typing it straight through, or pasting it, avoids that.
- Names can be anything — letters, numbers and underscores. Use the same name twice and it fills in both places.
- The checklist has to be started on the job before you build the report, or that spot comes out empty. The preview says so in red.
- Headers and footers are dropped. Converting Word to a PDF this way loses the running header and footer, so put anything that must appear — a document number, a revision — in the body of the document instead.
- Images, tables and headings all come through. Logos and diagrams in the template print as they are.
Stuck on a template? Send it to info@datumvia.com and we will put the brackets in for you.