Your own checklist, step by step
A checklist is how an inspection becomes a consistent record with photographs attached to the items they belong to. Datumvia ships twelve sample lists, but the useful one is the one that matches how you inspect. Here is how to build it, use it, and pass it to your crew.
1. Start from a sample, or blank
On a job, tap ☑ Checklist at the bottom of the drawing, then Start a checklist → Edit templates. You can reach the same screen before you have a job open.
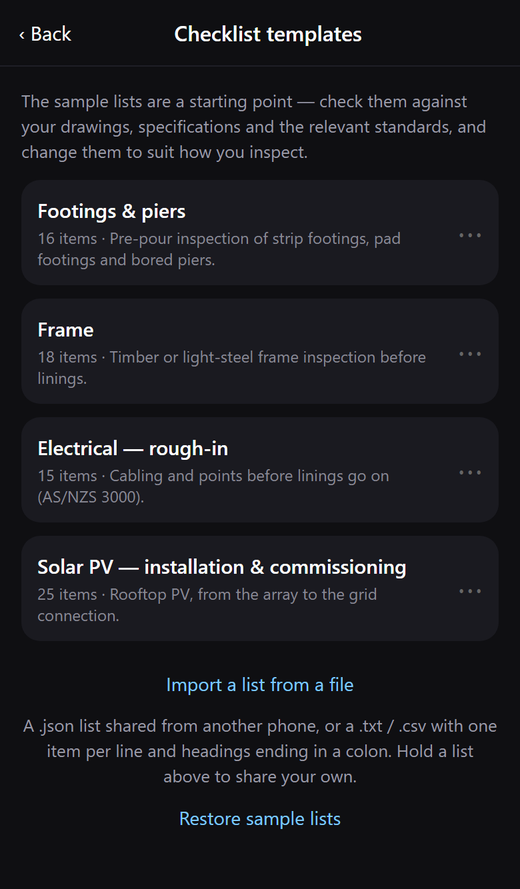
Three ways to start:
- Edit a sample. Tap it and change what doesn't suit. Quickest if a sample is close to your practice.
- Duplicate first. Hold a list → Duplicate, then edit the copy. Use this when you want both — the standard slab list and your own version for a difficult builder.
- Start blank. New checklist template at the bottom.
2. Build the list
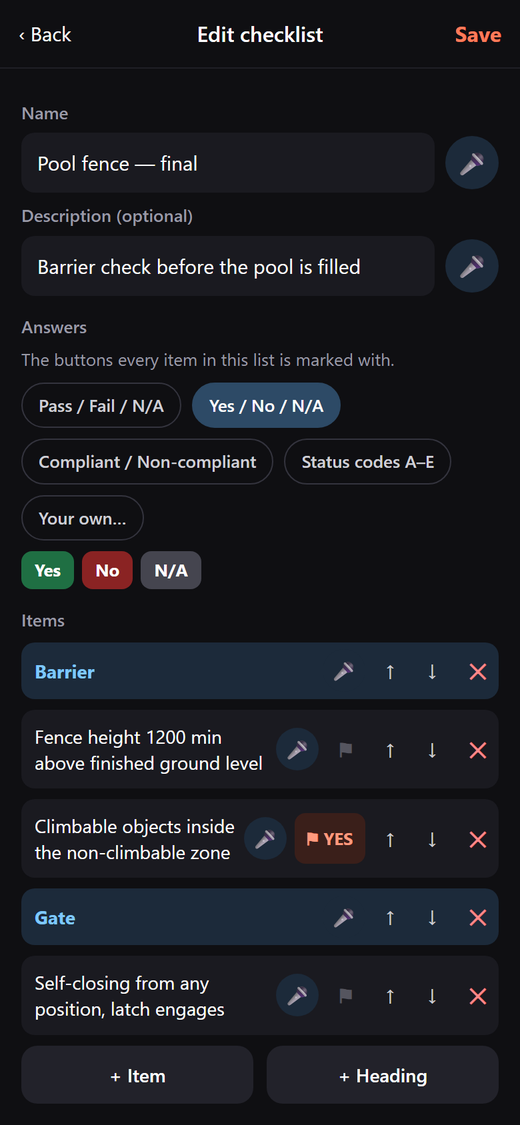
- Name it for the inspection, not the job — “Pool fence — final”, not “12 Example St”. You will pick it from a list every time.
- + Item adds a line to check. + Heading adds a section such as Barrier or Gate; everything under it is grouped by that heading on screen and in the report.
- ↑ ↓ move a row, ✕ deletes it.
- Answers sets the buttons every item is marked with: Pass / Fail / N/A, Yes / No / N/A, Compliant / Non-compliant, Satisfactory / Unsatisfactory, status codes A–E, or Your own…, written the same way as the Answers line in a file. The coloured chips underneath show how each one will read.
- The microphone beside each row dictates the item, which is faster than typing thirty of them.
- Save in the top right.
Write each item so it can be answered rather than pondered. “Fence height 1200 min above finished ground level” can be marked off in a second; “check the fence” cannot.
3. Use it on a job
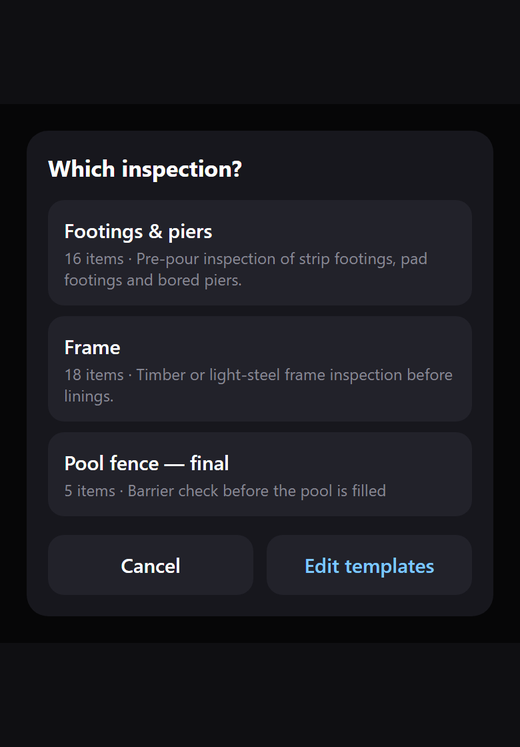
Back on the drawing, Start a checklist and pick it.
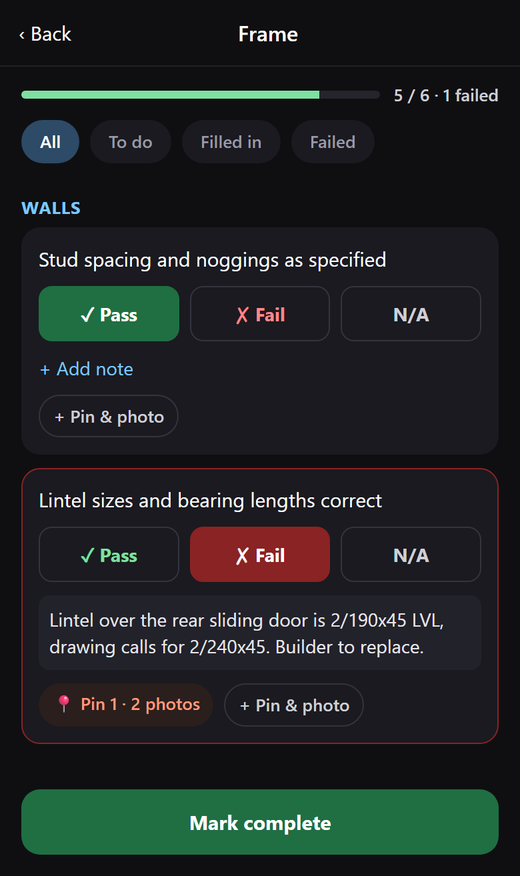
- + Pin & photo → New pin on drawing takes you back to the sheet to tap where it is, and the camera opens. Link existing pin uses a pin you already dropped.
- All / To do / Filled in / Failed filters a long list while you work through it.
- Mark complete stamps the date and your name from Profile. You can reopen it.
Writing a list at the computer
See what gets copied
Loading…
Remove client names, addresses and signatures before you upload the checklist — a blank copy is best. If your assistant can read web links, you can give it datumvia.com/ai/checklist.md instead of pasting.
Thirty items is faster typed on a keyboard. Write them in Notepad, Word or a spreadsheet, one per line, and put a colon on the end of a line to make it a heading:
Barrier:
Fence height 1200 min above finished ground level
No climbable objects inside the non-climbable zone
Gate:
Self-closing from any position, latch engages
Opens away from the pool area
Asking for different answers
Every item in a list is answered with the same buttons, so the answers are set once for the list
rather than on each line. That is the difference from a report template, where
{{outcome | Pass | Fail}} sets the choices for that one field: there, each bracket is
its own value; here, one set of buttons serves the whole list.
On the phone, choose them under Answers in the checklist editor. In a file, start with an Answers: line:
Answers: A = Inspected, B = Repairs made, C = Repairs required, D = Urgent repairs, E = Do not use
Structure:
Beam webs and flanges free of corrosion
Welds sound and free of cracking
The part before the = is the button and what prints in the report; the part after it
is spelled out under the item on screen and in the key at the top of the printed list. Plain names
work too — Answers: Pass, Fail, N/A. Leave the line out and you get the usual
pass / fail / N/A.
Sorting lists by discipline
Each list can belong to a discipline — Structural, Electrical, Solar & battery, or any name you like — so a long list of checklists can be filtered. Set it under Discipline in the checklist editor, or add a line to a list file:
Discipline: Electrical
Answers: Pass, Fail, N/A
Switchboard:
Main switch labelled
The sample lists already have one. Lists without a discipline show under Other. The filter you pick when starting a checklist is remembered, so an electrician lands on Electrical every time.
When the concerning answer changes from item to item
Some forms — a Take 5 or a pre-start safety check — ask questions both ways round. “Am I fit to perform this task?” is a problem when the answer is No; “Can I slip, trip or fall?” is a problem when it’s Yes. Add the concerning answer in square brackets with an exclamation mark at the end of the line:
Answers: Yes, No, N/A
Am I fit to perform this task? [!No]
Can I slip, trip or fall? [!Yes]
Datumvia then outlines the item in red and counts it only when that answer is picked, and asks for a note straight away — the job the paper form does with “if the bold box is ticked, describe the hazard and controls”. A line without a marker follows the list’s usual rule. Mark only the lines that go against it, or mark every line on a form where the concern flips back and forth, so nobody has to know which way the default runs.
On the phone it’s the ⚑ button on each item in the checklist editor: tap it to step through the answers, and again to go back to the usual rule.
Datumvia reads which answers mean trouble, so the counts and the red highlighting still work: anything that says fail, urgent, unsafe, defect or do not use counts as a failure; required, outstanding, rectify or repair reads as work to come; N/A and not applicable count as neither.
Save it as .txt or .csv (a spreadsheet's first column is used, so you can keep your own notes in the next column), put it where the phone can reach it — email, Drive, Files — then Import a list from a file on the templates screen. The file name becomes the list name. Bullets and numbering are stripped, so a list pasted out of a specification usually comes in clean.
Sharing it with your crew
Hold a list → Share a copy. That writes a .json file you can email or
drop in Drive; on the other phone, Import a list from a file brings it in with its
headings and answers intact. It is the practical way to keep a team working to the same list, and
the way to move your lists to a new phone.
An import never overwrites. A list with a name that is already there arrives as a copy, so nothing anyone relied on disappears underneath them.
How it reaches the report
By default the list prints behind the report, each item with its result, note and a tappable link to its photos. With your own Word template you can instead print it inside the report where you want it, or a line referring to it by number. See both, side by side.
Tips
- Answers can be more than pass and fail. See asking for different answers — status codes A to E, for instance. A list shared from another phone keeps whatever it arrived with.
- Keep a rectification list. Run the same list again on the re-inspection: the report numbers them 2.1, 2.2, 2.3 in the order you started them.
- Filled-in items only. When you send, Filled-in items only prints just the items you touched — handy if you keep one long general list and only use part of it.
- Deleted a sample by mistake? Restore sample lists at the bottom of the templates screen brings it back.
Want a starting list for your trade that isn't in the samples? Email info@datumvia.com and we will draft one.